
Sometimes you do not need to hide an entire app. You only need to cover one part of the screen.
It might be a customer name in a support tool, a balance in a dashboard, a private chat in the corner, a token in a terminal, a distracting sidebar, or one field you simply do not want visible while you work. The rest of the screen is useful. One area is not.
That is the job Cloaky is built for: placing live masks on top of your Mac screen so you can cover, blur, dim, or hide specific areas without changing the app underneath.
If you searched for cover part of screen Mac, blur part of screen Mac, hide part of screen Mac, screen mask Mac, or Mac screen overlay, this guide walks through the practical ways to do it and when a dedicated mask is the cleaner choice.
What it means to cover part of your screen
Covering part of the screen is different from hiding an app, minimizing a window, or editing a screenshot.
You are still using the real app. You still want the useful parts visible. You only want one region to stay out of sight.
That region might need to be fully hidden with a solid cover. It might only need to be blurred so the layout still makes sense. Or it might need to be dimmed so a noisy area stops pulling attention.
The important part is that the mask is live. It sits above your Mac screen while you work, present, record, or share. You can move it, resize it, change its style, and remove it when you are done.
Why this matters on Mac
Mac apps often mix useful context with details you do not want to show.
A dashboard can show the chart you need and the account balance you do not. A support tool can show the ticket flow and the customer email you should hide. A browser can show the product page and a private admin sidebar. A creative app can show the workspace and a reference, score, timer, or panel you do not want to look at.
In those moments, rearranging the whole workspace is too much. Cropping the window may break the flow. Editing later only helps if the work is not live.
A screen mask solves the smaller problem: keep the screen usable, hide the part that should not be visible.
Common ways people try to hide one part of the screen
Before using a dedicated masking tool, people usually try a few workarounds.
Move or resize the window
This works when the sensitive area is near the edge of a window. You can sometimes move the app partly off screen or resize it until the private section disappears.
The downside is that it changes the workspace. Dashboards stop fitting. Demos look cramped. A layout that was clear can become awkward just because one field needs to be hidden.
It is also fragile. One accidental resize, one new panel, or one layout change can bring the private area back into view.
Cover the area with another window
You can place a Sticky Note, Finder window, blank browser window, or small utility window over the area.
This can help in a pinch, but it usually feels clumsy. The covering window can take focus, show a title bar, receive clicks, appear in the Dock, or move when you did not intend it to.
It also tends to look like a workaround in demos and recordings.
Use an annotation or screenshot tool
Some tools can pin an image or draw on top of the screen. That may work for a quick one-off cover.
But if you need repeated masking, click-through behavior, blur, opacity, shortcuts, or masks attached to app windows, a general annotation tool starts to feel like the wrong layer of the stack.
Blur in editing later
Post-production blur is useful for polished videos. It is not enough for live calls, in-person reviews, office displays, or anything where the screen is visible before editing.
It also creates cleanup work after every recording. If the private area moves, you may have to track it. If you miss a frame, the information is exposed.
A dedicated screen mask is usually cleaner
A screen mask is built for this exact job. It lets you cover or blur a region of your Mac screen while the rest of the workspace stays normal.
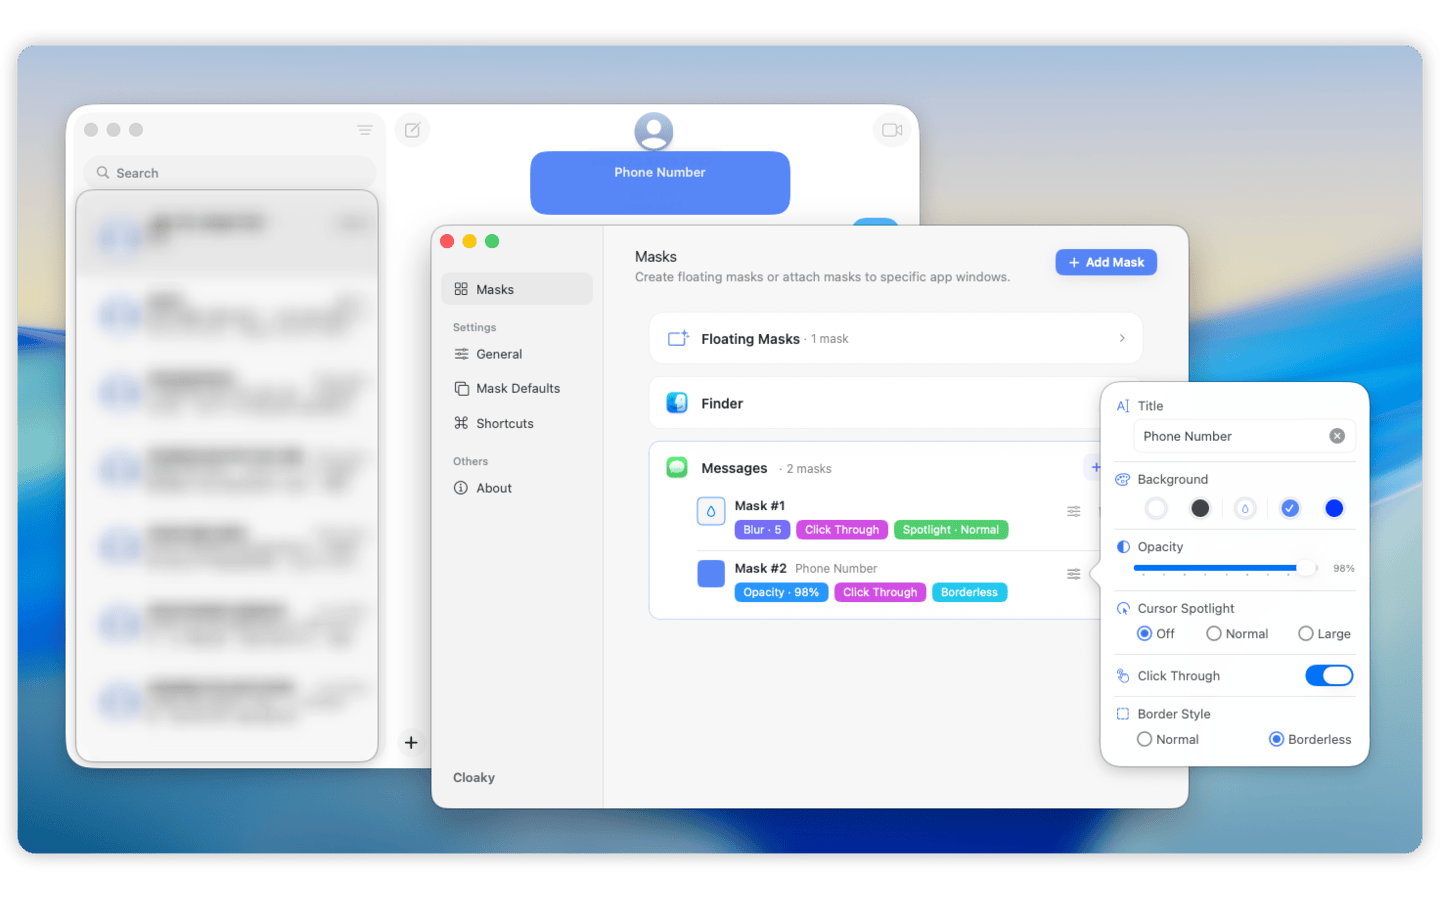
With Cloaky, you can create masks that sit on top of your screen, choose solid cover, blur, dimming, opacity, border style, and other appearance settings, then position the mask where it belongs.
You can use a floating mask when the area stays in the same place on the display. You can also attach a mask to an app window when the private area belongs to a specific app and should move with it.
That means the original app stays unchanged. You are not editing the dashboard, hiding columns, changing the product state, moving browser tabs, or rebuilding a fake workspace just to make one view safer.
How to cover or blur part of your Mac screen with Cloaky
Here is the basic workflow.
Step 1: Choose the area to hide
Start with the smallest useful region.
Good candidates include:
- Customer names, emails, and profile photos
- Account balances, revenue numbers, and private metrics
- API keys, tokens, private URLs, and internal IDs
- Admin controls or internal-only navigation
- Chat messages and notifications
- Sidebars, scoreboards, timers, spoilers, or distracting panels
- Any field you need to hide during a demo, recording, review, or focused work session
The best mask is usually boring. It hides the one thing that should be hidden and lets the rest of the screen keep doing its job.
Step 2: Create a mask
Open Cloaky and add a mask over the target area.
Use a floating mask for areas that stay fixed on your display. This works well for dashboards, status panels, notification areas, and screen corners.
Use an app-attached mask when the area belongs to a specific app window. This helps when the window may move, but the sensitive part inside that window should remain covered.
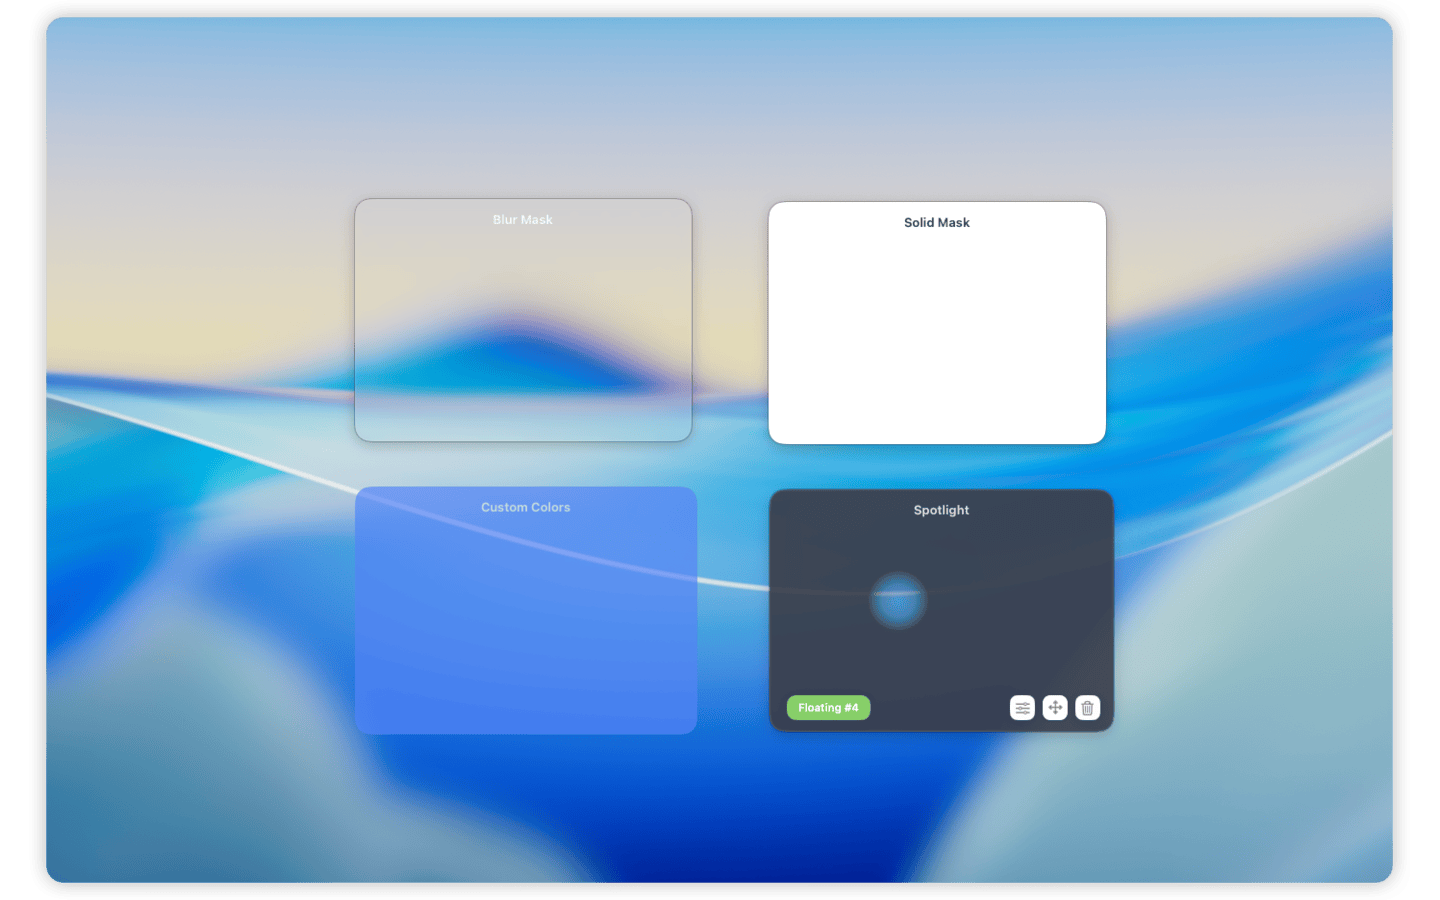
Step 3: Pick cover, blur, or dim
Use a solid cover when the content must not be readable. This is the safest choice for credentials, balances, customer information, internal IDs, or anything you cannot risk exposing.
Use blur when you want the interface to remain understandable, but the details should disappear. Blur often feels more natural in demos because viewers can still understand the shape of the app.
Use dimming when the goal is focus rather than privacy. A dimmed area can calm down a noisy workspace without making the screen feel blocked.
Step 4: Resize and position carefully
Resize the mask so it covers the target with a small margin.
Too tight, and a few pixels can leak around the edge. Too large, and the screen starts to feel more hidden than necessary.
For repeated work, save or reuse a consistent style so the mask does not need to be rebuilt every time.
Step 5: Tune interaction
If the mask covers an area you do not need to click, click-through can make the workspace feel smoother. You keep working in the app while the mask remains visually on top.
Shortcuts are useful when you need to show or hide masks quickly before a recording, call, demo, or in-person review.
Where screen masks are useful
Cloaky is not only for online screen sharing. Any time a Mac screen is visible, one area may need to stay hidden.
Recordings and tutorials
Real recordings often happen in real accounts, dashboards, and workspaces. That is where names, emails, balances, private URLs, and internal labels show up.
Instead of rebuilding a fake environment for every video, you can mask the sensitive parts and keep the flow natural.
Live demos and presentations
Demos are easier when you can use the real product state. But real product state often includes details you do not want to show.
A mask keeps the useful context visible while hiding the private area. This is cleaner than zooming the screen, cropping the app, or repeatedly telling people to ignore part of the interface.
Screen sharing and online calls
When sharing your screen, even a small field can become a problem: a customer email, an account name, a message preview, or an internal admin control.
A live mask helps you prepare the screen before the call starts instead of reacting after something is already visible.
In-person work and office displays
Privacy is not limited to remote calls. If someone is standing beside your desk, looking at a meeting room display, or walking past an office screen, local information can be exposed too.
Cloaky can cover private fields while you continue using the same app in the same room.
Focus and distraction control
Not every mask is about privacy. Sometimes you want to stop seeing one part of the screen.
Cover or dim a chat column, a metrics panel, a timer, a score, a sidebar, or any visual cue that keeps pulling attention. The rest of the app stays available.
A note about screen sharing and recording
If you share or record your full display, a screen mask appears on top of the display just like you see it.
Some meeting and recording tools can capture only one app window. That mode can behave differently, because the tool may capture the app window directly instead of the full display where Cloaky draws the mask.
For anything sensitive, test the exact sharing or recording mode before the real session. If you need the mask to appear, full-display capture is the safer choice.
FAQ
Can I cover only part of my Mac screen?
Yes. Cloaky lets you place a live mask over a selected area while the rest of your Mac screen remains usable.
Can I blur only part of the screen?
Yes. You can use blur instead of a solid cover when you want to hide details but keep the layout understandable.
Can I use a black box or rectangle if I want the area fully hidden?
Yes. A solid cover is useful when the content should not be readable at all.
Does Cloaky change the original app?
No. Cloaky draws masks on top of the screen. The app underneath stays unchanged.
Can I use Cloaky when I am not screen sharing?
Yes. Cloaky is useful for recordings, office displays, in-person work, focus, demos, presentations, and everyday privacy.
Can I attach a mask to a specific app window?
Yes. You can use floating masks or app-attached masks depending on where the hidden area is.
Will masks appear in recordings or calls?
If you capture the full display, the mask appears as part of what is on screen. If your tool captures only one app window, test first because single-window capture may bypass overlays.
Keep the useful parts visible
The cleanest workspace is not always the one where everything is hidden. It is the one where the useful parts stay visible and the sensitive or distracting parts stay out of sight.
Cloaky gives you a simple way to cover, blur, dim, or hide part of your Mac screen without changing the app, rearranging the workspace, or editing everything later.